Indoor growing
Does This Houseplant Need a Larger Pot?
Use the plant’s condition and growing space to decide whether repotting is useful, rather than choosing a container first.
A propagation plan begins with plant identification and a suitable node, not a shelf full of jars.
I would prepare a place for a cutting before removing anything from the parent plant. It is easy to admire a trailing stem and assume a jar of water will do the rest, but the method needs to suit the identified plant. A leaf, a stem tip and a division are different starting materials. Finding a guide for the species is more useful than copying the shape of an attractive propagation display.
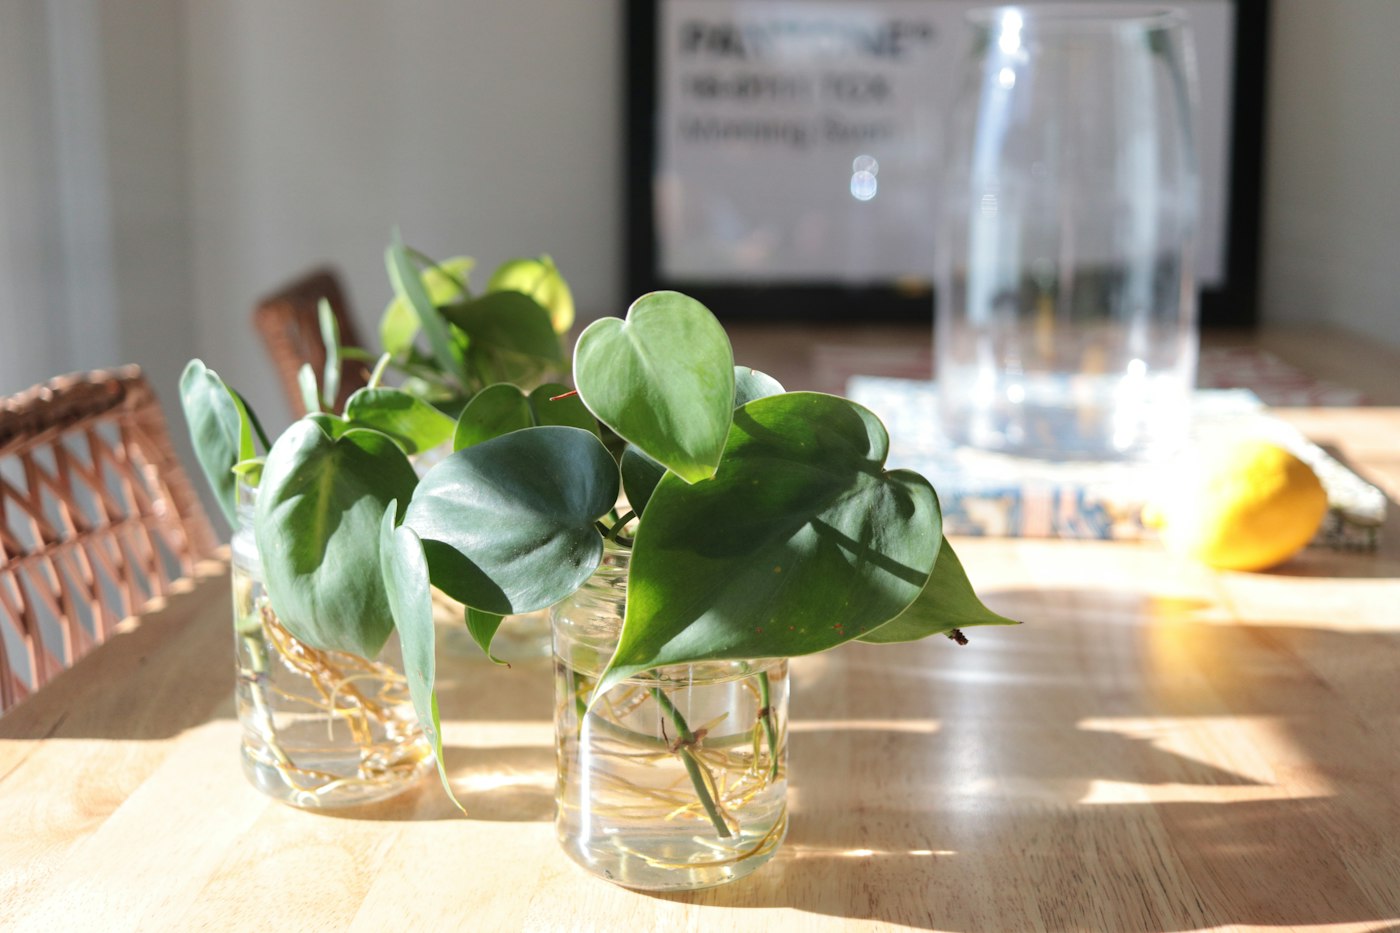
For a houseplant suited to stem-tip cuttings, locating the nodes helps you choose a useful piece and position it correctly. Iowa State University Extension provides a method that uses a healthy stem with multiple nodes, a suitable rooting medium and appropriate conditions. The photograph above shows water propagation, but this article follows the rooting-medium approach. Check which method is appropriate before treating those setups as interchangeable.
The rest of the task is preparation and patient observation: identify the plant, check the parent, arrange the container, take a suitable cutting and keep a small record. One considered attempt can answer more than a collection of unlabeled pieces taken at once. There is no need to promise yourself a certain number of new plants by a deadline, or to keep cutting from a parent whose condition is uncertain.
Start by tracing a suitable stem and locating where leaves attach. These attachment points are nodes. Compare what you see with a species-specific guide or a clear botanical illustration before deciding where to cut. A smooth stretch between nodes and a leaf blade are not interchangeable with the stem section the method calls for. If the plant is still unidentified, pause here rather than experimenting with every available piece.
Imagine examining a healthy trailing houseplant that a reliable guide confirms is suitable for stem cuttings. Count the nodes you would retain, identify which end is the growing tip, and check the proposed piece against the method. You can do this while the stem is still attached. That makes it easier to change your choice without sacrificing material or trying to reconstruct the original direction from several similar pieces.
I would take a photograph of the chosen stem before cutting, especially when learning to recognize nodes. Mark the intended lower end in a sketch if needed. This is a planning aid, not a substitute for identifying the plant. If you cannot explain which part will go into the medium and which leaves will remain above it, reread the instructions before putting the cutting tool to work.
Look at the parent as a whole, including the leaves and stems around the piece you intend to take. Choose healthy material and investigate unexplained damage or signs of pests before propagating it. A cutting is not a reliable shortcut for solving a problem you have not identified. Photograph anything uncertain and seek appropriate plant advice rather than assuming a healthy-looking tip is separate from the rest of the plant.
For example, unexplained webbing or discoloured patches would be a reason to pause and inspect more closely. Those observations do not by themselves establish a particular pest or disease. I would keep the propagation plan on hold until the condition is understood, instead of buying treatments at random or making several cuttings to see which survives. The question is whether to proceed, not how many pieces to remove quickly.
Also consider how the removal will affect the parent’s appearance and your permission to do it. On someone else’s plant, agree on the actual stem before beginning. A generous offer of a cutting need not mean taking several growing tips. On a small plant, leaving it to grow may be the better choice. A suitable propagation method does not make every parent ready for unlimited pruning.
For the rooting-medium method, prepare a small, clean container with adequate drainage holes and a suitable, lightly moistened rooting medium. Set out a label and clean cutting tool before removing any plant material. Work where cut pieces will not be mistaken for edible herbs, and keep unknown or toxic plants and tools away from children and pets.
Choose the medium from the method for the identified plant, rather than using whatever is left in an old outdoor pot. The relevant extension guide explains suitable rooting materials and drainage. Check that you have everything before taking the cutting. If the container, medium or location is still undecided, leave the stem on the parent while you resolve those questions; there is no benefit in creating a rushed setup.
Write the plant name and date on a label that will stay with the container. Add the source of the propagation instructions to a separate note. If you later ask for help, you can explain which method you followed instead of reconstructing it from memory. When several household members care for plants, make clear that the new container has its own instructions and should not automatically receive the established plant’s usual watering.
Follow the selected method for making the cut and preparing the stem. In Iowa State’s houseplant method, the chosen section has at least two nodes, and lower leaves are removed so that foliage is not buried. Work with a suitable clean cutting tool. Set the parent safely aside afterward so you can concentrate on preparing the cutting without balancing both containers in the same crowded space.
Make a hole in the prepared medium before inserting the stem, rather than forcing it down. Place at least one node beneath the surface while keeping leaves above it, following the method for the identified plant. Check the original orientation so the lower end goes into the medium. A clear label and the earlier photograph can help if stem sections look similar when placed on the work surface.
Before moving the container, look at the arrangement from the side. Is the cutting supported? Are leaves resting on the medium? Is the label still readable? Correct a simple positioning problem now, then leave the cutting undisturbed. This final look is about following the chosen method, not proving that roots will form. A carefully prepared cutting can still fail, and that possibility should remain part of the plan.
The cutting starts without an established root system, meaning it cannot take up water in the usual way. Follow the species-specific guidance for moisture, humidity, and light while it roots. More water in the bottom of the pot is not a substitute for appropriate humidity. A cutting in harsh sun or standing water can struggle for reasons unrelated to the position of the node.
Choose the location before deciding whether a humidity cover is part of the method. A covered pot needs the light and air exchange described in the relevant guidance; setting it in strong sun because it looks like a miniature greenhouse can create a different problem. Use the instructions as a complete arrangement rather than combining the cover from one method with the window position from another.
Make a check that answers a question: has the medium dried, has the cover shifted, or is a leaf touching the wet surface? Record a change before responding to it. Do not treat every quiet day as evidence that more water, stronger light or another product is needed. A simple setup is easier to observe when adjustments are deliberate and tied to the plant’s requirements.
Allow time rather than pulling out the cutting each morning. Follow the selected guide for checking establishment and deciding when to pot it on. New top growth alone is not a complete view of the roots. The guide may describe a gentle check for resistance, but that does not mean repeatedly lifting the stem for inspection. Keep expectations tied to the species and conditions rather than a universal deadline.
If material deteriorates or becomes moldy, follow the guide’s advice about removing it and reassess before taking more. A note can record the visible change, the medium used and recent care. It cannot establish that one particular watering caused the failure. I would look for a specific question to resolve on the next attempt, such as whether the chosen location matched the instructions, instead of simply increasing the number of cuttings.
For a hypothetical unsuccessful attempt, a useful final note might be: “Plant identified; parent appeared healthy; medium stayed wet; light at this spot uncertain.” That gives you something to investigate. “I am bad at plants” gives you nothing to adjust. Equally, a cutting that succeeds once does not prove the method suits every houseplant. Keep the record attached to the species, setup and observations that actually belong to that attempt.
No. Some species root readily in water; others are better suited to a rooting medium or a different propagation method. Check the identified plant first.
Ask the owner before cutting. Agree on the stem and method; a photograph of an appealing plant is not permission to remove part of it.
No. Iowa State’s guidance treats rooting hormone as optional for some stem-cutting methods. Check the identified plant and follow any product label if you choose to use it. Adding more is not a substitute for a suitable cutting and growing conditions.
The rooting-medium method keeps leaves above the surface and places the appropriate stem nodes below it. Buried foliage can deteriorate in the damp medium. Prepare the cutting according to its species-specific instructions rather than stripping every leaf from the stem.
Avoid repeated uprooting to inspect it. Follow the relevant guide for checking establishment and transplanting; a gentle resistance check, where advised, is different from pulling the cutting out each day. Watch and record changes without constantly disturbing the setup.
The useful first step is choosing a method for the plant you actually have. Then prepare the container, identify the nodes and keep the intended orientation clear before cutting. A small, well-described attempt is easier to learn from than an assortment of unlabeled stems. Progress comes from matching the setup to the plant and observing it patiently, with no guarantee that every cutting will succeed.
Have a correction? Contact the editors.
Use the plant’s condition and growing space to decide whether repotting is useful, rather than choosing a container first.
Make room for observation before placing a new plant beside the rest of the collection.
Match the care plan to the plants, the absence and the person helping, rather than giving every pot the same drink.